Git & GitHub Introduction
Git :
Git is fast, easy to learn, distributed version control
system created by Linus Torvalds: The man who created Linux operating
system. Git was originally created for managing & developing Linux kernel
software. Many large IT players like Google, Netflix, Twitter, Facebook are
using Git for managing their key projects and it’s extremely popular among
developers. Git is platform, file type and programming language
independent.
Traditional code repositories like CVS keeps single central
repo but Git provides a local copy of repo to each developer while maintaining
a remote central master repo. Local repo can be synced and push changes to
remote repo as and when required.
GitHub:
GitHub is Git repository hosting service, owned by Microsoft
since 2018. Basically, it is central or remote repository where all Git
projects created in developers’ machine can be hosted for sharing with large
audiences. It is largest host of source code in the world at the moment.
Key Concepts:
Team will use a central repo for collecting all changes –
called the ‘remote’ repo’.
GitHub is typically the remote repo host. It is available at
- https://github.com/
Provides communication collaboration tools and repo hosting
Provides proven and effective workflow for contributors.
Workflow:
1.
Set up Git and GitHub on local machine.
2.
Initialize Git in local machine.
3.
Clone a remote repo from GitHub and create a local
copy.
4.
This local repo branch will be used by developers to
work on.
5.
Developer creates new file and change existing file in project.
6.
Commits new changes locally in his machine.
7.
Then developer pushes changes to remote repo.
8.
Developer performs a Pull request.
9.
Changes are then reviewed by remote repo owner and he
accepts or deny.
10. If accepted, new changes are merged into
remote trunk.
11. If denied, developer makes improvements and
pushes again.
12. Before
pushing local changes, developer must perform remote pull so he has latest of
remote repo.
Another example of Git repository is GitLab: https://about.gitlab.com/
But this blog covers GitHub only.
Setting up Git and GitHub:
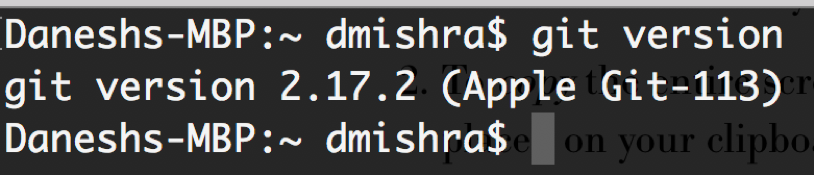
Step1: Download
Git or check in your machine if you already have Git installed (for those using
Mac you may have Apple git already provided).
$ Git --version OR $
Git version
Note: For those Windows OS, all Git commands will remain
same. As you will be using GitBash – Provided by Git when you install from https://git-scm.com/

Step2: For
detailed instructions on how to setup and use GitHub you may also watch my you-tube
blog: https://www.youtube.com/watch?v=PRz0o-eYvCM&t=10s
Step 3: Key Git Commands
$
git init
|
Sets
up a project directory for working with Git
|
$
git config
|
|
$
git add
|
Adds
a file to Git’s index (staging area) so it can be tracked
|
$
git status
|
Provides
report of staging area content and committed content
|
$
git commit
|
Moves
staged files into local history
|
$
git push
|
Copies
local changes to a remote repo
|
$
git pull
|
Copies
changes in a remote repo to a local rep/
|
$
git clone
|
Copies
an entire project from a remote repo to create a local repo
|
Step 4: Command CheatSheet
$ git version or $ git
--version
|
To
check git version installed
|
$ git init
|
Use
this command on new project folder which you want to make a local repo. This
will initialise git on this location and creates a hidden directory called ‘.git’
|
$
git config - - global user.name “github
user name”
$
git config - - global user.email “test@gmail.com”
|
This
is metadata that will be used by other git commands to track changes by user
details. Due to use of – global keyword , user details will be applicable to
all github projects in this machine.
|
$
git clone “Remote repo URL”
|
Clones
a remote repo using its GitHub URL
|
$
git status
|
Provides
details of changes in local repo vs remote repo
|
$ git add . or $ git add “filename or file name with
wildcard chars” e.g. *.java, *.js
|
Adds changes to local repo’s
staging area
|
$ git rm “file name”
|
Removes a file from a staging
area so its no longer tracked
|
$ git commit -m “any comments..”
|
Commits changes to local repo.
Comments are mandatory.
|
$ git remote add origin “HTTPS
URL of github repo”
|
This will ask for user name
& password of your GitHub account. This is pre-requisite before you push
your local repo to a remote repo whose URL is used in command.
|
$ git push -u origin master
|
Push local repo to remote repo
in GitHub
|
$ git log
|
Shows commit logs
|
$ git help
|
Help manual
|
$ git pull
|
Pulls any changes from remote
repo to local repo.
|
Step5: Create branch of existing repository in GitHub.
1. Create a new dir and do $git init
2. Clone a remote repo in local machine. Using
Git clone command. e.g. $ git clone 'https://github.com/danesm/GithubDemo.git'
3. Cd into new local repo
4. Now create a new branch of master repo
which you just cloned. By using following commands - git branch branchdemo1
5. git checkout
branchdemo1
6. Now add a new file to the branch. By using
– $ touch ‘newfile.html’
7. Now you have a branch named ‘branchdemo1’of master repo ‘GithubDemo’ created on local machine. And have added a new
file to the branch.
8. At the moment the new file is not
visible to master repo.
9. Now do usual git add and commit operations
on local branch repo to add the new file.
10. Check everything is fine - $git status
11. Checkout master and pull any new
changes that might have been pushed by other users. $git checkout master and then $git pull
12. Now go back to the local branch using-
$git checkout branchdemo1
13. Then merge with master using - $git merge master -m “comments”
14. Then, $git
push –set-upstream origin branchdemo1, this will push all latest changes from local branch to
remote repo.
15. Now go to GitHub page and refresh the
repo to see the new branch. So now we can see the new branch but the file ‘branchdemofile.html’
is still not visible. This is because we need to first create pull request and
then accept changes into master repo.

16. Use $git
branch command to check
which branch you are in.

17. Now go to the GitHub master repo page
and create a pull request which will be reviewed by all owners and then
accepted or rejected for further improvement.


18. Now you can see all changes from the
branch inside the master repo. And your changes are ready for other users of
master repo to pull.
19. Next step is to update your local
master repo with your branch changes. So just switch to local master and
perform a git pull to make sure you have all latest from remote master repo.
20. Now after pull request is accepted,
the new file is visible in master branch.

So now we have successfully created a
new local branch of remote repo and added new file to the branch then pushed
changes to remote repo using- pull request process.
Additional Info:
Following is log of the terminal to
compare if you want to follow the steps.


Step6: Using SSH keys with GitHub
· Connect to GitHub without supplying
username and password every time you push code.
· This will be specific to your
laptop/computer
· ls -al ~/.ssh to see if existing SSH keys are
present
· If you don’t want to use existing
ones you can create new ones
· Warning!! Always remove your SSH key if
changing/selling computer.
·
Warning!! Do not
use SSH login in public/shared computer.
Create SSH keys :
· $ ssh-keygen -t rsa -b 4096 -C "your_email@example.com"
· This creates a new ssh key, using the
provided email as a label.
· Creates public/private rsa key pair.
· Use default file names unless its
required to change.
· Now add keys to SSH agent and store
password in keychain
$ ssh-add -K ~/.ssh/id_rsa
Add the SSH public key to GitHub repo:
· $ pbcopy < ~/.ssh/id_rsa.pub
· Copies the contents of the id_rsa.pub
file to your clipboard
· Paste the key into your account’s settings > SSH Keys text
box
· $ git remote –v to view existing remotes.
· To change the remote URL from HTTPS to
SSH
· $ git remote set-url origin git@github.com:USERNAME/REPOSITORY.git
After this you no need to provide username or password
for pushing the changes.
If you work on a different repo , just add
the keys using following and it will be all set.
$ ssh-add -K ~/.ssh/id_rsa
Thank you.

Comments
Post a Comment